
How to Terminate SWA Cable With a CW Gland: Step by Step Guide
KEY TAKEAWAYS
- Terminating SWA cable properly takes 10 steps, and the armour clamp and earth bond matter most.
- Use a CW gland for any outdoor or damp entry. BW glands are for dry indoor use only.
- SWA gland size depends on your cable’s measured outer diameter, so check the maker’s chart every time.
- Paint on a gland plate can break the earth path. Strip it back or use serrated washers.
- Test continuity before you close the enclosure. It takes minutes and catches the most common termination fault.
By the end of this guide, you’ll know how to terminate SWA cable with a CW gland, from the first cut to the final continuity test. It takes about 15 minutes to read, and about the same to fit once you know the steps. We wrote it for electricians and installers who fit SWA cable on garden supplies, outbuildings, and commercial jobs. Fixed wiring must meet BS 7671, so if you aren’t competent to do this work, use a qualified electrician.
What Does It Mean to Terminate SWA Cable?
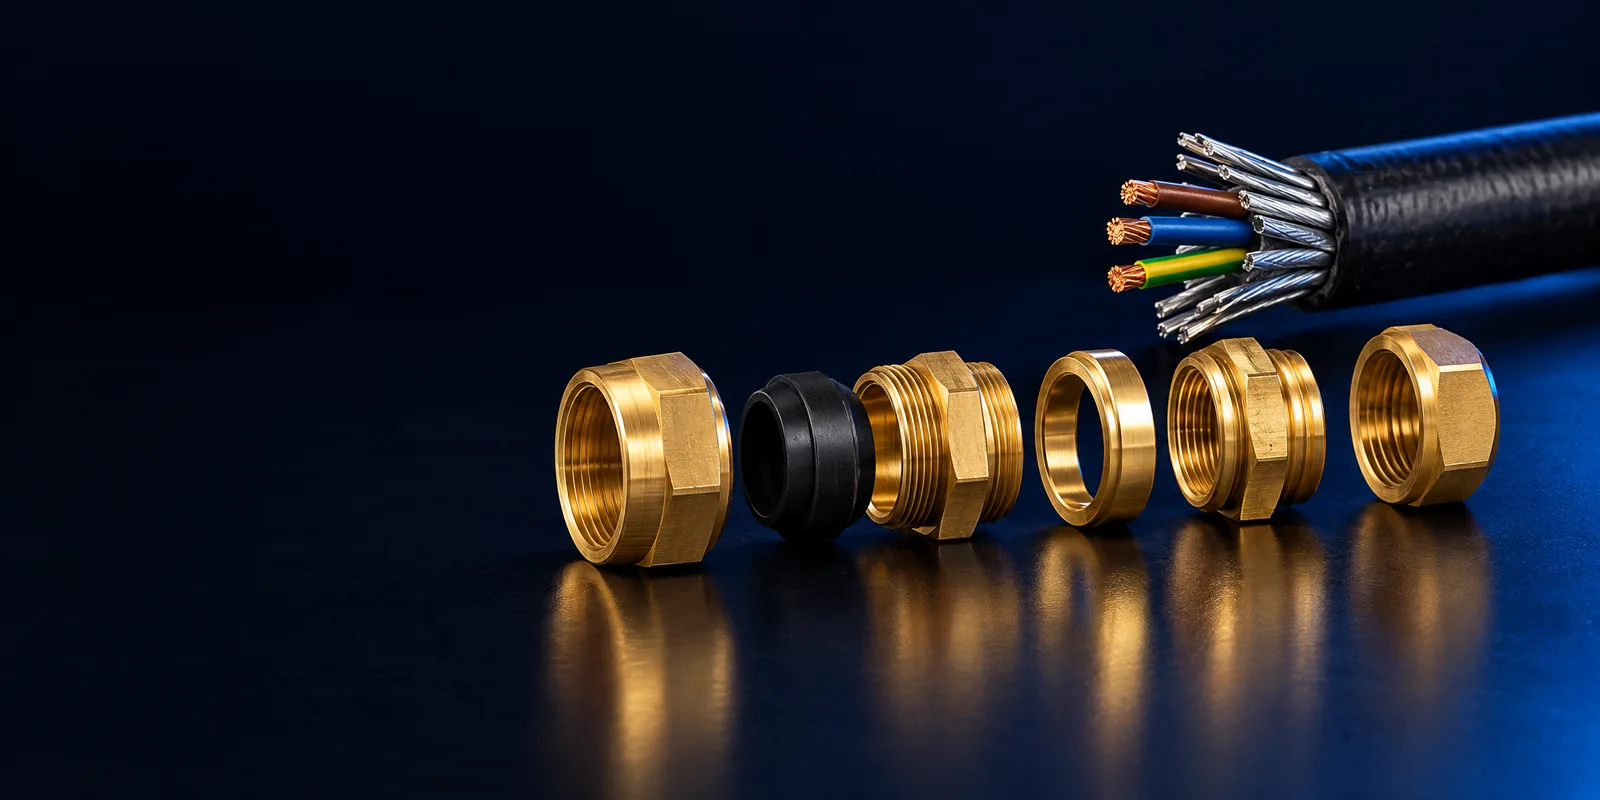
Knowing how to terminate SWA cable means knowing how to fit a CW gland that clamps the steel wire armour, bonds it to earth, and seals the cable entry. SWA stands for steel wire armoured, a cable with a layer of steel wires under the outer sheath for mechanical protection. The gland is what connects that armour to the rest of the installation. Key components include the gland body, armour cone, clamping ring, outer seal, locknut, earth tag, and gland shroud. We see the same pattern on every job: the cable is rarely the problem, the termination is. In many UK installations the armour also acts as the circuit protective conductor, so a good SWA cable termination is a safety job as much as a mechanical one.
Why Does SWA Cable Termination Go Wrong?
Most failures happen because the gland looks right but isn’t doing its job. A loose armour clamp gives high resistance. An unsealed entry lets in water. A missing earth tag leaves the armour unbonded.
None of this shows on day one. It shows up as a failed test at sign-off, or as corrosion inside an enclosure two winters later. Fixing it means reopening a sealed enclosure and re-terminating a cable that’s already dressed and clipped.
The good news is that nearly every fault traces back to a handful of steps. Get those right and the rest is routine.
What Tools and Parts Do You Need?
You need the right parts before you start, because a missing shroud or earth tag stops the job halfway. Most SWA gland packs include the gland, locknut, earth tag, and gland shroud together.
Here’s the kit we’d have in the van:
- A CW gland sized for your cable, with locknut, earth tag, and shroud
- An IP washer or sealing washer for the enclosure entry
- A cable knife or SWA stripper
- Side cutters or armour cutters
- Spanners sized to the gland nuts
- A continuity tester and an insulation resistance tester
- SWA cable clips
Check what’s in the pack. Some glands ship with the shroud and washer, others sell them separately. A gland only reaches its rated IP when fitted with the correct washer and shroud on a matching entry, not as a bare gland.
Armoured Cable Gland BW vs CW Cable Glands: What’s the Difference?
The difference between BW and CW glands is the outer seal. A BW gland clamps the armour and gives earth continuity, but it doesn’t seal the cable’s outer sheath. A CW gland adds a compression seal that grips the sheath, which gives it weatherproofing. That’s why BW glands are for indoor, dry locations and CW glands are used indoors or outdoors. Manufacturers’ 2026 datasheets, such as Deta Electrical’s SWA brass gland range, draw the line in the same place.
For anyone who wants the detail, a CW gland also seals against the inner bedding in many designs, and it typically reaches IP66 or higher when fitted with the right washer and shroud.
The question we hear most is “can I use silicone around a BW gland instead?” No. Sealant doesn’t replace a compression seal, and it won’t pass inspection against an outdoor IP requirement. If there’s any chance of moisture or condensation, use a CW gland. It works indoors too, so it’s the safe default.
How Do You Choose the Right SWA Gland Size?
Choose SWA gland size by matching your cable’s measured overall outer diameter to the gland’s cable range, not by conductor size. A 20S gland is not simply “for 20mm cable”. The thread is M20, but the cable range is set by the seals and cone.
Measure the cable’s outer sheath with calipers. Then check the manufacturer’s chart. For example, Deta Electrical’s February 2026 datasheet lists a 20S gland for cables between 11.8mm and 15.8mm overall diameter. Ranges differ between brands, so always verify.
The S, standard, and L suffixes exist so one thread size can cover different cable diameters. Too small and the armour won’t clamp properly. Too large and the seal won’t grip the sheath.
A common doubt is whether a close fit is good enough. It isn’t. Check the chart and keep the diameter inside the stated range.
How to Fit an SWA Gland: Step by Step
Here’s how to fit an SWA gland in 10 steps. Always follow the manufacturer’s instructions for your specific gland, as component order varies slightly between makes.
- Check the size and prepare the entry. Confirm the gland suits your cable diameter and the enclosure thread. If the gland plate is painted or powder-coated, strip the coating back to bare metal around the hole, or plan to use serrated washers.
- Strip the outer sheath. Cut back the sheath to expose the armour, taking care not to nick the wires or the bedding beneath. Support the cable so it doesn’t twist.
- Slide on the components. Put the shroud on first, then the gland nut and outer seal (on a CW gland), then the clamping ring.
- Fit the cone. Push the cone and body onto the cable so the armour wires sit around the cone.
- Fold and clamp the armour. Spread the armour wires evenly over the cone, then bring the clamping ring down. Tighten to the manufacturer’s torque. Trim any wires sticking out past the clamp.
- Strip the bedding. Cut back the inner bedding to expose the cores, leaving enough length to reach the terminals.
- Fit to the enclosure. Pass the gland through the entry, fit the IP washer, earth tag, and locknut, then tighten.
- Tighten the outer seal. On a CW gland, tighten the outer nut until the seal grips the sheath. This is a separate step from the armour clamp.
- Fit the shroud. Slide the gland shroud over the finished gland, then terminate the cores.
- Test and clip. Test, then secure the cable with SWA clips.
How Do You Fit an Earth Tag and Gland Shroud Correctly?
The earth tag is a brass washer with a tail that bonds the gland to the enclosure earth. Fit it on the gland thread alongside the locknut, as the manufacturer shows, then run a green and yellow conductor from the tag to the earth bar. Without it, the armour has no reliable bond.
On painted plates, the tag alone isn’t enough. Paint insulates the locknut from the enclosure. Either remove the paint or use double-sided serrated washers to bite through it. Many installers daisy-chain tags to cut down the earth bar terminations.
The gland shroud is a PVC or LSF sleeve over the finished gland. It protects the seal from UV and adds corrosion protection. Slide it on before you terminate the cores, since it won’t fit afterwards.
The usual pushback is “isn’t the shroud optional?” For outdoor work, treat it as part of the IP rating.
How Do You Test an SWA Cable Termination?
Test the armour’s continuity to the earth bar, then the insulation resistance of the cores. You do this before closing the enclosure, because it’s the only way to prove the bond works.
For continuity, measure from the armour or gland plate to the earth bar and confirm a low-resistance reading. The figure you need depends on your circuit design and BS 7671, so check your own requirements. For insulation resistance, test between cores and between cores and earth, following your testing procedure.
Think of a typical garden office supply. The CW gland is torqued correctly and the shroud is on. Continuity still fails because the plate’s powder coating was never removed. Ten minutes with an abrasive disc fixes it, but only if you test before sealing up. We build the test into every termination for that reason.
What Are the Most Common SWA Termination Mistakes?
The same errors repeat on real jobs:
- Using a BW gland where moisture will reach the entry
- Choosing SWA gland size from conductor size instead of cable diameter
- Leaving uneven or overlong armour wires under the clamp
- Forgetting the earth tag
- Over-tightening the gland and damaging the seal
- Leaving paint on the gland plate
- Skipping the shroud outdoors
Every one is avoidable if you know to check it.
Get the Right Gland Before You Start
You’re the one making the call on site and doing the fitting. We help with what comes before it: the right CW gland, the right size, with the earth tag, locknut, and gland shroud ready to go.
Tell us your cable and where it’s going, and we’ll help you match the armoured cable gland to the job. That means no mid-job trip for a missing part, no reopened enclosure, and a termination that passes first time.
Browse our armoured cable gland range and get the right gland for your next SWA termination.
Frequently asked questions
How do you terminate SWA cable with a CW gland?
Strip the outer sheath, slide on the shroud, nut, and seal, then fold the armour over the cone and clamp it to the maker’s torque. Fit the gland to the enclosure with the earth tag and locknut, tighten the outer seal, then test continuity.
What size gland do I need for my SWA cable?
Match the cable’s measured outer diameter to the gland’s stated cable range on the manufacturer’s chart. Don’t choose by conductor size, because ranges vary between brands and size suffixes.
Do I always need an earth tag on an SWA gland?
Yes, when the armour is used as the circuit protective conductor. The earth tag bonds the armour to the enclosure earth, so leaving it off breaks the protective path.
What is a gland shroud for?
A gland shroud is a PVC or LSF sleeve that covers the finished gland. It protects the seal from UV and adds corrosion protection, which matters for outdoor installations.